
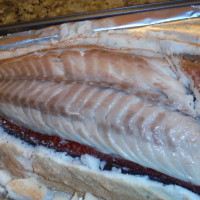
One of my blog buddies, Matt at Functional Fishaholics, recently mentioned that he didn’t really know how to filet a fish. Growing up, I’d catch fish and then give them to my mom to cook (except for the rare trout that I could gut and gill easily and throw in a pan), so didn’t know how to filet either. When I started getting on boats here in Southern California, I would watch in fascination at the ease (and SPEED) with which the deckhands could filet a fish. I wanted to learn that skill, so I sometimes take my fish whole and cut them myself (then I can use the heads and carcasses to make fish stock). I have some level of proficiency now, so this is a skill you can learn. Here’s how to do it.

Step One: Cross Cut
Step One: I’m right handed, so I like to put the head in my left hand, and have the belly facing away from me. Make a diagonal cut behind the gill plates, all the way to the bone, across the body of the fish.

Step Two: Butt Cut
Step Two: Not everyone does this, but I’ve found it helps a lot in making sure the filet separates from the bone more easily. Make a cut along the bottom length of the fish from where you started your cross cut to the butt of the fish.

Step Three: Along The Bone
Step Three: This is the trickiest part. A) you need to have the confidence to cut along the bone. When I first started, I ended up leaving too much meat on the bone from not going deep enough. B) you are cutting through the ribs, which if you are cutting a big fish, can be difficult. With bigger fish, I’ll pull out my kitchen shears and snip the first few. One reason I love my filet knife, is that at the very tip there is some serration that makes this part easier in getting thru the ribs. Don’t cut through the skin at the tail. Leave it attached and then flip the skinned filet over the tail.

Step Four: Skin It
Step Four: This looks hard, but is actually pretty easy. Fish skin is surprisingly sturdy. At the tail end of the filet, carefully cut the meat down to the skin. Hold the fish down firmly by the tail. Then, with your knife parallel to the cutting board, cut down the length of the filet to separate the skin from the meat.

Step Five: Cut Off The Belly Meat
Step Five: Final step, behind the rib bones, cut away the belly meat from the rest of the filet. Now just rinse and you are done (with one filet). Repeat as needed 😉

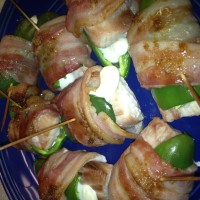
The Finished Product: Ready For Cooking
Final note, if you choose to have this done on the boat (I do sometimes), you have options. At the end of a trip, your deckhand will ask you how you want your fish. These are your choices:
1. Gut and Gill: Exactly what it sounds like, they remove the guts and gills and leave the fish whole. The boats aren’t allowed to scale the fish (DFG rules to allow identification of the fish), so you may still need to scale it when you get home.
2. Slabs: That’s where they take it through Step 3, but cut through the skin at the tail end. Then they cut off the ribs and you are left with a filet, just skin on. These are great if you plan to grill or smoke your fish. If not, don’t choose this option as the fish scales will be an issue.
3. Filets: They do the whole thing, but they’ll leave a little tag of skin still attached to the filet. Leaving the skin on is a DFG rule, allowing an inspector to identify the species if they check your bag. Just remove the skin prior to cooking.
*** Editorial Note – Thanks to Steve Chadima, my colleague at work for finding my filet knife
RELATED ARTICLE – How To Filet Halibut and other flat fish


at 8:11 am
Nice how-to. I’ve been practicing on some Trout but their small size and my lack of a proper filet knife makes for a boney filet!
at 8:31 am
Trout is one fish I don’t really see a reason to filet (unless it’s a big one). I’ve only ever G&G’d them, season, dust them with flour and pan fry. Re: the knife, I failed to mention in the post to always sharpen before (and sometimes again during) getting into fileting. I use a wet sharpening stone (same that the deckhands use). I really like my knife, but I also keep a cheap one in my tackle box and have field fileted using it. It’s just practice.
at 9:05 am
Excellent tutorial! I might add for trout and salmon, you can remove their shoulder or pin bones by using a pair of tweezers or clean pliers after filleting. I have a pair of chromed needle nose dedicated for this use. Just grab the bones and yank prior to cooking. Although they pull easier after cooking, doing it after messes up the meat and lets it cool off.
at 9:11 am
Great comment Dave! If you fish those fish a lot (like I would now if I still lived in the PNW), I would keep a pair just for this purpose. Then I’d keep them tip top using the INOX MX3 Lube.
at 9:41 am
Ha! Unfortunately, my salmon comes from the store–my trout is from Irvine Lake or the sierras though. Most store salmon comes with them pulled but sometimes they don’t so you’ll have to yank them out.
at 10:52 am
Nicely done Salty!
You guys should learn to butterfly trout. Just throwing it out there , but for me I get more meat out of a trout if I butterfly it. It makes a nice big filet.
at 10:57 am
Good call. Makes for a great presentation on the plate too. How about a video Josh?
at 11:11 am
Maybe. With my luck I’d probably cut a finger off when I was filming 🙂
at 3:38 pm
Love your description and photos, Joe, and your link to Making a Fish Stock! Land-locked here in Chicagoland I like to buy the whole fish and then turn the fileting over to my helpful husband.
at 3:43 pm
Mari, I’ve got about a gallon of that fish stock in my freezer (in 1 qt containers). It’s a great thing to have on hand. I do the same when I butcher a whole chicken. Thanks for the kind words and stopping by!